Introduction Rule 1 - Logic The DCMA states that no more than 5% of incomplete tasks should be missing a predecessor and/or successor link. The Logic test looks at the […]

There are 3 pre-set Calendars available in Project…
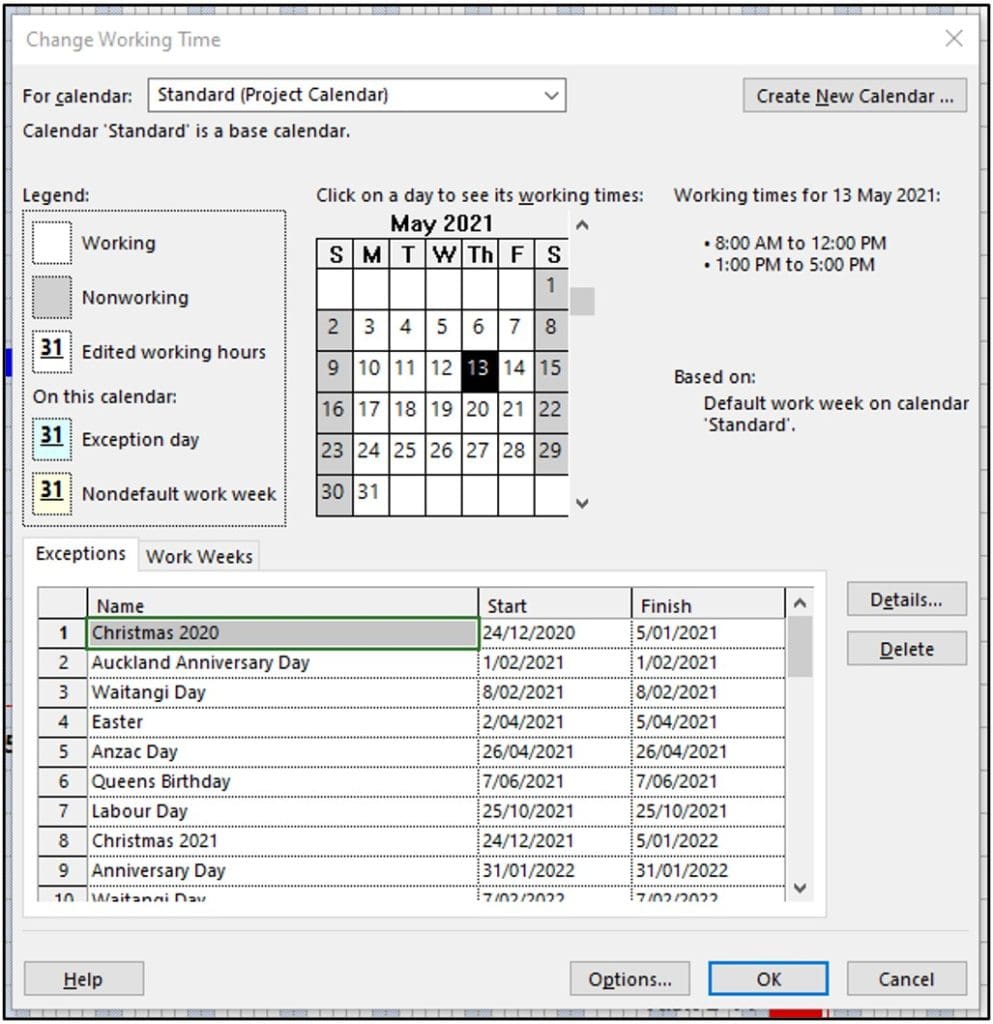
The default is Standard (Project Calendar) - Daytime 8-hour shift between 8am & 5pm (allows for 1 hr. lunch break) and running for 5 days/wk. Mon – Fri.
The others are:
These are all basic set ups which you will need to further customise to your needs and requirements.
Generally, you will be using the Standard Calendar, and before programming any works, you should set up the Calendar with the working hours of your project and the public holidays and any other envisaged non-working time such as Christmas or summer shutdowns for at least the duration of the project plus 6 months beyond.

Note, Sat & Sun are already set as non-working time by default; but this can be changed as required.
Calendars are fully customisable. However, I would advise keeping the working day set to
8hrs when programming even if you intend to run the project at 9 or 10 hrs. per day.
This is because the majority of people tend to think in terms of an 8-hr day & 40 hr. week and confusion and miscommunication can creep in very easily when talking at cross purposes.
If you are working a 10-hour day, all that will happen is that you will complete works faster than planned. This is better than planning 4 days duration (4x10 hrs. work) and then having a subcontractor taking 5 days (5x8 hrs. work).
Once you have customised your default calendar you can save it to your Global Template so that it is preloaded into each new programme you create.
The Project Calendar is not the only Calendar that’s available to you. In addition to the Project Calendar, you can create any number of separate individual calendars which can be assigned either to individual Resources, or individual Tasks. However, the way they are applied in each case is different.
You can create and save a customised Resource Calendar for say a specific trade and then assign it to that resource. To assign it to the resource, go to the Resource Sheet view and there is a column called base calendar. You can then click and choose to set the required calendar in this column.

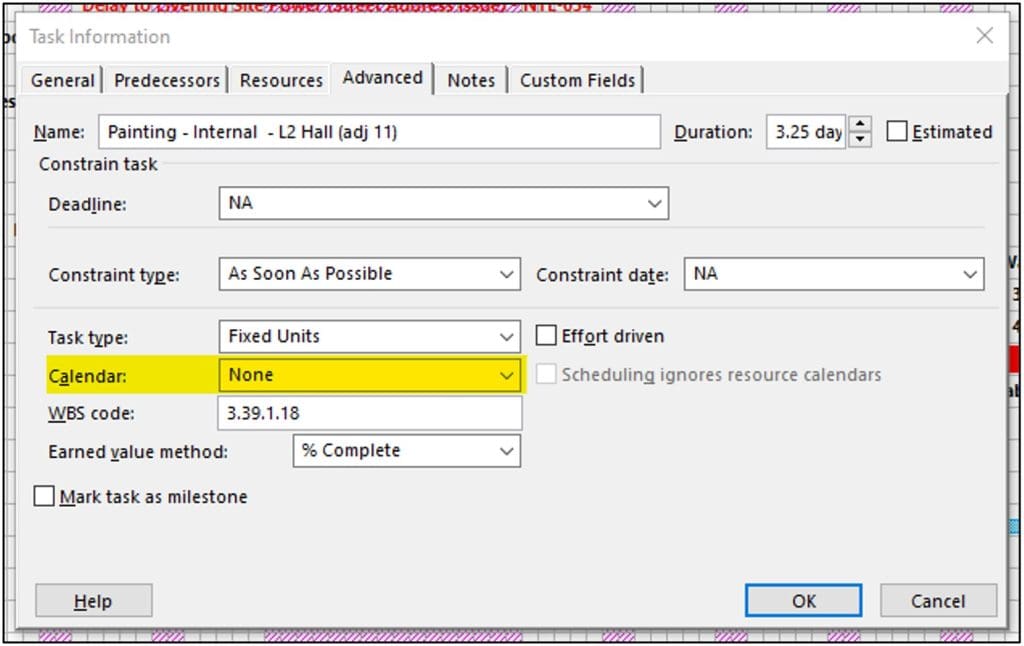
To assign a Task Calendar to a task, you can either use the information box for one or multiple selected tasks on the Advanced tab of the Task Information dialogue box, accessed by right click on a task and choose it from the drop-down list.

Or secondly for a more bulk approach, insert a column called Task Calendar onto your worksheet, right click on a column heading and choose insert column where you want it to show.

Just a few things to note about calendars:
Always set up your project calendar before you enter any tasks on a new programme - holidays working time etc.
Calendars have the following priority levels:
Other things to note when setting working times for calendars:
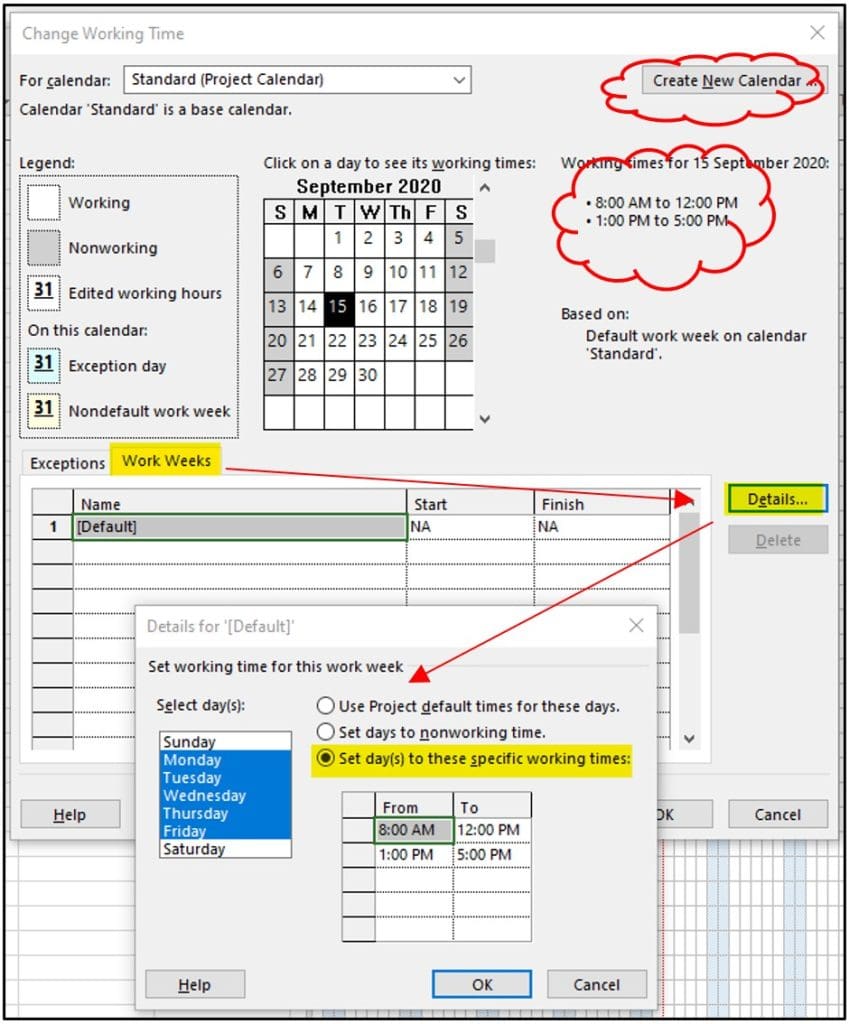
To change the working times on a Calendar, go to the Project Tab > Change Working Time.
And either create a new calendar or update an existing one by setting the required times. See below:

Note that the Default working times over-ride times set in the Project Calendar, so if you make changes there, you will need to coordinate the default start, finish, and hours to match, in the Project Options dialogue found under File > Options > Schedule.

Be aware, if you have multiple calendars in your programme, the one that will be displayed on your Gantt chart is generally the Standard Calendar.
If you want to display a different calendar you have to change the setting in the Non-working Time
tab in the Timescale dialogue box. This is accessed either by double clicking the Timescale at the top of the Gantt chart or double clicking on an area of non-working time on the Gantt chart itself.

If you have any questions regarding MS Project's calendars, or anything else, feel free to email at JustAsk@Menlo-Academy.com.
Preview and download the article below:
Introduction Rule 1 - Logic The DCMA states that no more than 5% of incomplete tasks should be missing a predecessor and/or successor link. The Logic test looks at the […]
The Project Statistics button is a super quick and extremely useful “status-at-a-glance” snapshot of the programme, which gives an immediate overview of all of the key information for the project.
Setting up and inserting a Logo into the Print of a Programme is easy. When you are in Print Preview, go into the Page Setup dialogue, and choose either the Header or Footer Tab
Many companies invest heavily in Plant & Equipment, so it naturally follows that having spent all that money, they will want to maximise the equipment’s use as efficiently as possible. Sometimes though, keeping track of everything can be a bit like herding chickens...